When to Harvest Hardneck Garlic
- Jere Folgert
- Jul 26, 2019
- 6 min read
Updated: Jan 26, 2024

When do We Harvest Hardneck Garlic ?
The Art of Timing: A Deep Dive into the Dastardly Dance of Digging Up Deliciousness - Harvesting Hardneck Garlic
Ah, hardneck garlic. The pungent prince of the allium world, the bulb of bold beauty, the flavor fiend that makes vampires cower and chefs swoon. But when, oh when, is it time to yank this subterranean treasure from its earthy embrace? Fear not, fellow garlic enthusiasts, for we embark on a scientific safari to unveil the secrets of harvest timing!
The Curious Case of the Yellowing Leaf:
Forget calendar dates, toss aside moon phases! The true harbinger of harvest is a visual cue – the browning, yellowing, or even shriveling of the bottom three leaves. These fallen comrades, you see, are intimately linked to the bulb's fate. Each leaf corresponds to a protective layer around the garlic's pearly pearls, and their demise signals the armor's formation.
Trial and Error, a Delicious Gamble:
But hold your shovels! This isn't a one-size-fits-all tango. Like a temperamental diva, each climate demands its own timing. In balmy Californias, you might be waltzing with garlic in late June, while frigid Minnesotas may have you waiting until August's twilight. Experimentation, our fearless friend, is key. Start by digging a bulb or two when the bottom three leaves show signs of fatigue. Are the cloves plump and pearly? Or scrawny and shy? Tweak your timing accordingly!
Science, the Savvy Sidekick:
But fear not, intuition isn't our only weapon. Science, like a wise old farmer, offers its wisdom. Monitoring soil temperatures can be your secret weapon. When soil temps dip below 50°F (10°C), garlic enters its slumbering stage, focusing on building those protective layers. This, my friends, is the sweet spot for harvest!
A Final Flourish:
So, the next time you see those bottom leaves bowing out, remember – it's not a farewell, it's a "see you soon" to deliciousness. Embrace the trial and error, befriend the soil temperature, and above all, have fun! For in the dance of harvesting hardneck garlic, the greatest reward is the symphony of flavor that awaits.
Now, go forth, fellow garlic gladiators, and conquer your harvest! And remember, if all else fails, just ask your neighbor – they've probably got a garlic-infused story or two to share.

1. Begin the Harvest When the Bottom few Leaves turn Brown and Wilt
Harvest one or two bulbs every week or so, as the bottom leaves begin to wilt and turn brown. This will help us determine the perfect time for harvest. Because garlic bulbs are beneath the soil, it is difficult to know the perfect time to harvest these gems. When the bottom three or four leaves begin to turn brown and dry, typically, the harvest should be commenced. Use a garden fork to loosen the soil around the base of each plant, making sure you do not puncture or damage the garlic bulb with the fork's tines. It is important to orientate the fork's metal tines so they penetrate the soil straight down, not at an angle. A garden fork typically works better than a spade or shovel. Garden spades carry more soil on their blade which is good for turning the topsoil over. A garden fork is preferred for loosening the soil, requiring less effort. If possible, wait for the soil to dry. Wet soil not only sticks to our boots, it also results in more dirt sticking to our prized garlic bulbs.

2. Gently Remove the Entire Plant from the Ground
After loosening the soil around the base of the garlic plant, gently grasp the middle of the plant's stem, and gently pull them from the earth. They should easily give up their grip! If the soil is not loosened, the garlic bulbs don't easily pull out of the ground, and by forcing the bulb from the ground, you can damage the protective wrappers that cover the delicate bulb. The reason we loosen the soil first is because, the garlic bulbs, have a deep-reaching root system. Never try to pull a garlic plant (including the bulb) from the ground without loosening the soil around the plant first.

3. Don't Worry about the Dirt and Soil Surrounding the Garlic Bulb
Gently shake, or brush off any large clumps of dirt or soil that are clinging to the garlic bulb. This should be a simple and relaxed task. Don't sweat the big stuff. Eventually, we'll remove the remaining soil after it dries and the garlic bulbs cure. In other words, after the entire plant has been removed from the earth, gently remove some of the excess dirt and soil by brushing off soil remnants clinging to the bulbs. We'll remove the remaining soil after the garlic cures. Be patient. The dirt is so much easier to remove after it dries out and the garlic bulb cures for three or four weeks.
4. Bundle The Hardneck Garlic Plants for Curing
Group together, three, four, five or six individual hardneck garlic plants and bundle them together. Hang the bundles in a well-ventilated location away from direct sunlight and rain. Allow the garlic to dry and cure for about three or four weeks. Do not wash any part of the bulbs or allow the bulbs to get wet. Leave the entire plant intact; bulb, stem, roots, and all. Garlic should be cured or dried before storing for later use.
When hanging the bundles of garlic, we've found that Reusable Zip Ties work really well. Not only are zip ties strong, but we can also slowly re-tighten the zip ties, as the garlic stems and leaves begin to dry and shrink. Likely, many of us are trying to reduce plastic waste by as much as possible. Re-using zip ties accomplished both! Use them this year, and again next year.

5 . Remove Roots and Stem. Release the Garlic Bulb!
This is the task where we release the beautiful garlic bulb from the entire plant structure. During this task, we also remove the dried roots. Wearing leather gloves, rub your glove over the dried roots and watch them turn into powdery dust and fall to the ground.
Now that the soil surrounding the bulb is dry and crusty, "clean the bulb" by removing the outer-most layer of the papery skin. Only remove one or two paper layers. Be careful not to expose any of the cloves. Again, do not wash or get the garlic bulb wet.
Next, clip or cut and remove the garlic stem and leaves from the garlic bulb. After the leaves, roots, and stem have dried, cut the center stem off, about 1 and 1/2 or 2 inches from the top of the garlic bulb. If you have a lot of garlic to process, use a battery-operated clipper to facilitate the task. These are also known as electric pruning shears. Sure, these rechargeable lithium smart pruning shears with carbon steel can easily remove a finger, but if you are careful, they will save you a great deal of time.

Storing or Planting Garlic in Autumn / Fall?
Store your prized garlic bulbs whole, in a dry, cool place, away from heat or sunlight. You can also separate the cloves from the bulbs and store the bulbs in a chest freezer for semi-long-term storage. Keep in mind the cloves will likely become a little soft and mushy after being in the freezer. Store entire garlic bulbs in a cool, dry place (NOT YOUR REFRIGERATOR) and they should last for a long time. Store the prized hardneck garlic in a location away from sunlight, heat, and an ultra-low humidity. The whole garlic bulbs will need some humidity to stay plump and viable. Too much humidity is not good. Definitely do not store the garlic in a refrigerator. Ideally, find a dark, cool place (33 to 55 degrees Fahrenheit) with some air circulation. Use a partially insulated garage. There is no reason to use a mesh bag or paper bag. A box is fine. Definitely do not store the garlic in a plastic bag.
In the northern hemisphere, as in Montana, Colorado, Wisconsin, Idaho, and Washington... plan to plant your garlic when the skeletons and goblins are roaming the neighborhood in search of cany; Around Haloween. Likely they will begin to sprout in the spring, given their internal clock and DNA programming.

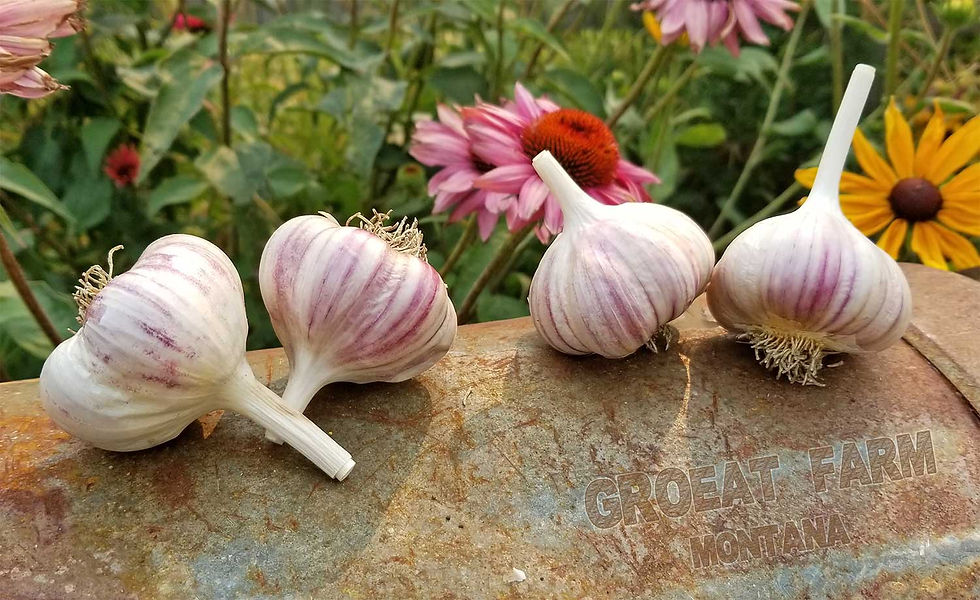
GroEat Farm, LLC is a small, independently-owned grower and supplier of premium quality hardneck garlic (seed and culinary). We provide exceptional quality hardneck garlic to nurseries, market growers, home garden enthusiasts, chefs, and anyone else looking for better hardneck garlic.
Our mission at GroEat Farm, LLC is to grow premium hardneck garlic, preserve garlic varieties for the future (through propagation), and to provide others with the opportunity to grow garlic from our seed. We help home gardeners, chefs, small-scale commercial growers, gardeners, plant nurseries, and anyone else looking for better hardneck garlic. We are continuing a very long tradition of growing quality gourmet and seed hardneck garlic.


